

- On sale!

Reference: DWM14042301
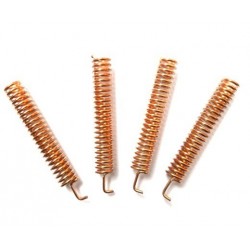
Spring antenna is specialized for wireless data transmission. This antenna with good performance of V.S.W.R, small size design, easily installation, stable performance and good anti-shock and anti-aged compatible for Hoperf Modules.
Reference: DWM14032902
SMA rf antenna connector is pallets copper gold andexternal thread needle sma pallets plate rf connector.
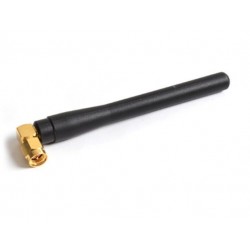
Reference: DWM14032102
Whip antenna for sub-1 GHz, 433MHz,868MHz and 915MHz with SMA male connectors.it's used with wireless module recommanded by Hoperf .
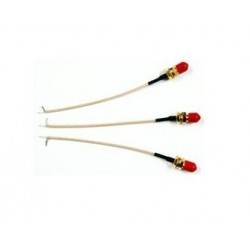
Reference: DWM14042401
SMA RG178 extension female cable for GPS, GSM antenna,RF module, SMA cable,IPEX to SMA jumper cable.
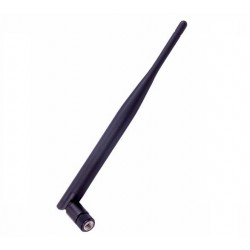
Reference: DWM18032302
USD3.0/pcs MOQ100pcs LoRa Antenna designed for Lora application which required for outdoor waterproof highgain and work at ISM free band like 433MHz /868MHz /915MHz SMA Male Whip antenna.
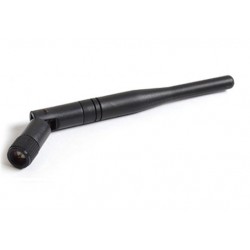
Reference: DWM16121503
DWM-TLB-3.0QB SUB-1GHz / 2.4GHz Whip antenna with a Collapsible SMA male connectors.Which are available for 433MHz,868MHz.915MHz and 2.4GHz..
Reference: DWM15101001
Brand: Semtech
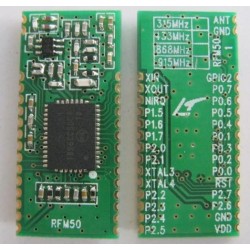
RFM50 module series’ design is based on the high performance RF50 SoC chip, It include a CIP-51 core‘ MCU and 100mW transceiver. It operate at 433/470/868/915 MHz ISM band, comply with FCC, ETSI regulation.
Reference: DWM15010504
Brand: Semtech
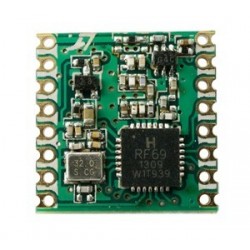
The RFM69CW /RFM69HCW are built in by SX1231and SX1231H which is ISM Free band transceiver module capable of operation over a wide frequency range, including the 433MHz,868MHz and 915MHz.

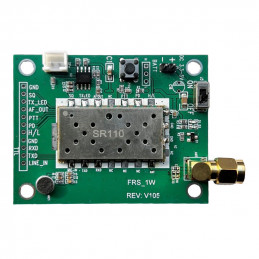
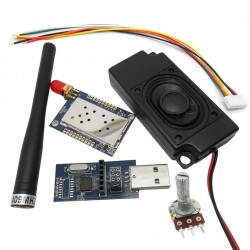
FRS-DEMO-B UHF/ VHF Walkie Talkie transceiver and Data transfer demo board which can be used for these module evaluation SR-FRS-1WU,SR-FRS-1WV,SR-FRS-2WU.
1. Outline
FRS-DEMO-B is designed for Walkie Talkie transceiver module demo as below:
SR_FRS_0W5U: 0.5W/400M-480M
SR-FRS-1W350: 1W/350M-390M
SR-FRS-1WU: 1W/400M-480M
SR_FRS_1WV: 1W/136M-174M
SR-FRS-2WU: 2W /400M-480M
it can be used for voice intercom and data transfer demonstration; also it can be used for development based on the demo board;
it is easy to set all the module parameter via the USB interface; When select the channel, it would voice broadcast the current channel number; You may quickly evaluate our module performance by the demo board, Just make a little modify, it can be directly applied into your real production.
2. The Demo board performance:
1) It has the power switch, volume adjust , Channel selection switch ;
16 channels can be selected by the encoder switch;
2) It is easy to switch the VOX(Sound control transmit) by a VOX switch, the VOX level can be set via the PC;
3) Voice broadcast for the channel number, Chinese/English could be selected.
4) Monitor function by press [MON]key;
5) Voice intercom demo;
6) Data transfer demo;
7) One group user interface: SQ, LINE_IN, LINE_OUT, PTT, GND
8) Could restore to the factory parameter setting
9) The demo board parameter can be set via the USB interface, for the setting instruction please contact us to get the 《serial communication protocol》
Tx frequency, Rx frequency can be set alone;
Tx CTCSS, Rx CTCSS can be set alone;
Rf output power can be set by software;
Companding setting;
Transmit Busy lock setting;
Squelch level setting
GBW bandwidth setting
MIC sensitivity setting
Scramble setting
Volume setting
VOX level setting
TOT setting(Timer of transmit)
Auto power save setting
Data transfer
All setting can be kept when power off
3. The demo board function define picture
1) The demo board size:45mm X 90 mm;
2) DC power supply:3.3V-5V;
3) USB type: MICRO USB;
4) User interface:SQ, Line _in, Line_out, PTT, GND;
When use Line_in,Should push the MIC selection to “EXT”position;
5) LED:
Red led: DC power indication;
Yellow: Transmit status indication
Blue: Receive signal indication
4. The demo board operation
4.1 The voice intercom
1. Please mount the power, antenna, speaker; Push the MIC select switch to ‘INT’ position;
2. Power on the demo board , the power indication LED(red) turns on, Then rotate the volume adjust switch to a proper position; After about 1seconds, the demo board would voice broadcast the current channel number;
3. Adjust the channel selection switch, ensure the transmitter and receiver are at the same channel;
4. Hold on the [PTT] key, the transmit indication LED(yellow) turns on, You may talk to the opposite side; After finished the talking, release the [PTT] key, the system automatically into the receive statues, When received the signal from the opposite side, The receive indication LED(blue)turns on;
5. At weak signal area, you may hold on the[MON] key, the system into monitor mode, release the [MON]key, the monitor mode is cancelled;
6. The frequency and the CTCSS for every channel can be set alone via the USB interface;
4.2 The sound control(VOX)
1. Push VOX switch to ON position, the VOX function is enabled, You may talk without [PTT]key, the system will automatically into transmit status.;
2. During the VOX valid status,The transmit indication LED(Yellow) turns on;
When VOX enabled, the [PTT] key is still valid;
3. Push VOX switch to OFF position, the VOX function is disabled, you can only intercom by press the [PTT] key;
4. The VOX sensitivity can be set via the USB interface;
4.3 User interface
1. The demo board provide some useful interface for the user
SQ: 0: with valid receive signal; 1: without receive signal;
Line_in: May connect to an external Microphone, or an external audio source;
MIC select switch” must at the “EXT” position;
Line_out:The Frs module audio frequency directly output, Not via the audio amplify;
PTT: 0: Transmit; 1:Receive;
GND: GND;
4.4 Restore to the factory setting
1. Power off;
2. Press the [PTT] and hold on, then Power on; When the transmit indicate LED fast blink, you may release[PTT] key;
3. When finished the system initialization,Transmit indication LED turns off,The system into the standby mode;
4.5 Data transfer/SMS transfer
1. Connect the Demo board USB and the PC usb by MICRO USB cable;
2. Send command:AT+DMOMES=[Length]xxxxxxxxxxx
3. For the detail of the command ,please refer the UART communication protocol;
4. For how to make the data transfer please refer “4.7 USB interface for parameter setting”
4.6 USB interface for parameter setting
1. Firstly, you must install the USB driver,please download from the link:
https://www.prolific.com.tw/US/ShowProduct.aspx?p_id=225&pcid=41
NOTES: The USB 2 COM chip for this demo board is PL2303HX, it can only support the OS to WIN7, if you want support the OS to WIN8, please replace the PL2303HX with PL2303TA;
2. Power on the demo board, Connect the demo board and the PC with the Micro USB cable.
3. PC COM port setting
Serial port;May be COM1,COM2.COM3…. etc.
Baut: 9600 only;
Parity:None
Data:8
stop:1
4. Frs module parameter setting
Here is a example for GROUP COMMAND Setting:
AT+DMOSETGROUP=0,450.0500,450.0500,0,2,0,0
(An “Enter” must be added at the end of the command)
The parameter contents are as below in turn:
0:Narrow
450.0500:Transmit frequency( MHZ)
450.0500:Receive frequency ( MHZ)
0:Receive CTCSS
2:Squelch level
0:Transmit CTCSS
0:Rf output power and etc. :
Comment:
1) The Tx Frequency and Rx Frequency can be set alone.
2) The Tx CTCSS and Rx CTCSS can be set alone.
3) The parameter can’t be kept because of this demo board without MCU.

At the end of the command, a “enter” must be done then click the “send”;
If the command is sent correctly, then the module returns
+DMOSETGROUP:0 to the receive area
The other parameter setting is same as the Group setting, Please refer 《Serial communication protocol》
4) Short message / Data transfer
Prepare 2 sets PC, All the PC must connect the demo board correctly;
Suppose PC1 as the data transfer,and PC2 as the data receiver;
Transfer data by PC1:
a) Input the command with Text format ( Don’t check the “Send as hex”)
AT+DMOMES=7ABCDEFG
(must click “Enter” key once from the keyboard)

Because the SMS length should be Hex, The command should be converted into HEX format, And modify the Length manually.
b) Check the item of serial tool“Send as HEX”
Now the command of text format is converted to HEX format automatically;
41 54 2B 44 4D 4F 4D 45 53 3D 37 41 42 43 44 45 46 47 0D 0A
The “37” Should be modified to be “07” manually , because the Length Byte is Hex;
The right command should be:
41 54 2B 44 4D 4F 4D 45 53 3D 07 41 42 43 44 45 46 47 0D 0A

c) Click “Send”
d) Once the message is sent correctly by module,The module would report the transfer results to PC, that is , the contents as below would be displayed on PC1.
+ DMOMES:0
Receive data by PC2:
Once received a message /data , The receive area would display as below:
a) When not check“Receive as HEX” ,The display contents would be: +DMOMES=*ABCDEFG

b) When check “Receive as HEX” ,The display contents would be:
2B 44 4D 4F 4D 45 53 3D 07 41 42 43 44 45 46 47 0D 0A

5. The default parameter for demo board:
5.1 UHF(400M-480M) demo board
Band width:Narrow;
Squelch level: 2;
VOX sensitivity:6
MIC sensitivity:6
Volume:6
Scramble:OFF
Tx output power:1W (valid only for SR_FRS_1W) ;
Companding:OFF
Busy lock:OFF
TOT(Timer of Transmit):3minutes
The default frequency and CTCSS
|
Channel |
Transmit frequency (MHZ) |
Receive frequency (MHZ) |
Transmit CTCSS |
Receive CTCSS |
|
1 |
450.0500 |
450.0500 |
0 |
0 |
|
2 |
450.0750 |
450.0750 |
0 |
0 |
|
3 |
450.1000 |
450.1000 |
0 |
0 |
|
4 |
450.1250 |
450.1250 |
0 |
0 |
|
5 |
450.1500 |
450.1500 |
0 |
0 |
|
6 |
450.1750 |
450.1750 |
0 |
0 |
|
7 |
450.2000 |
450.2000 |
0 |
0 |
|
8 |
450.2250 |
450.2250 |
0 |
0 |
|
9 |
450.2500 |
450.2500 |
0 |
0 |
|
10 |
450.2750 |
450.2750 |
0 |
0 |
|
11 |
450.3000 |
450.3000 |
0 |
0 |
|
12 |
450.3250 |
450.3250 |
0 |
0 |
|
13 |
450.3500 |
450.3500 |
0 |
0 |
|
14 |
450.3750 |
450.3750 |
0 |
0 |
|
15 |
450.4000 |
450.4000 |
0 |
0 |
|
16 |
450.4250 |
450.4250 |
0 |
0 |
5.2 VHF(136M-174M)demo board
Band width:Narrow;
Squelch level: 2;
VOX sensitivity:6
MIC sensitivity:6
Volume:6
Scramble:OFF
Tx output power:1W (valid only for SR_FRS_1W) ;
Companding:OFF
Busy lock:OFF
TOT(Timer of Transmit):3minutes
The default frequency and CTCSS
|
Channel |
Transmit frequency (MHZ) |
Receive frequency (MHZ) |
Transmit CTCSS |
Receive CTCSS |
|
1 |
150.0500 |
150.0500 |
0 |
0 |
|
2 |
150.0750 |
150.0750 |
0 |
0 |
|
3 |
150.1000 |
150.1000 |
0 |
0 |
|
4 |
150.1250 |
150.1250 |
0 |
0 |
|
5 |
150.1500 |
150.1500 |
0 |
0 |
|
6 |
150.1750 |
150.1750 |
0 |
0 |
|
7 |
150.2000 |
150.2000 |
0 |
0 |
|
8 |
150.2250 |
150.2250 |
0 |
0 |
|
9 |
150.2500 |
150.2500 |
0 |
0 |
|
10 |
150.2750 |
150.2750 |
0 |
0 |
|
11 |
150.3000 |
150.3000 |
0 |
0 |
|
12 |
150.3250 |
150.3250 |
0 |
0 |
|
13 |
150.3500 |
150.3500 |
0 |
0 |
|
14 |
150.3750 |
150.3750 |
0 |
0 |
|
15 |
150.4000 |
150.4000 |
0 |
0 |
|
16 |
150.4250 |
150.4250 |
0 |
0 |
6.The standard FRS frequency assignment
|
Channel |
China (MHZ) |
American (MHZ) |
European (MHZ) |
Australia (MHZ) |
|
1 |
409.7500 |
462.5625 |
446.00625 |
476.625 |
|
2 |
409.7625 |
462.5875 |
446.01875 |
476.650 |
|
3 |
409.7750 |
462.6125 |
446.03125 |
476.675 |
|
4 |
409.7875 |
462.6375 |
446.04375 |
476.700 |
|
5 |
409.8000 |
462.6625 |
446.05625 |
476.725 |
|
6 |
409.8125 |
462.6875 |
446.06875 |
476.750 |
|
7 |
409.8250 |
.462.7125 |
446.08125 |
476.775 |
|
8 |
409.8375 |
467.5625 |
446.09375 |
476.800 |
|
9 |
409.8500 |
467.5875 |
476.825 |
|
|
10 |
409.8625 |
467.6125 |
476.875 |
|
|
11 |
409.8750 |
467.6375 |
476.900 |
|
|
12 |
409.8875 |
467.6625 |
476.925 |
|
|
13 |
409.9000 |
467.6875 |
477.000 |
|
|
14 |
409.9125 |
467.7125 |
477.025 |
|
|
15 |
409.9250 |
477.050 |
||
|
16 |
409.9375 |
477.075 |
||
|
17 |
409.9500 |
477.100 |
||
|
18 |
409.9625 |
477.150 |
||
|
19 |
409.9750 |
|||
|
20 |
409.9875 |
7. Comment
1) About the antenna we sent to you
For 1W UHF module, The antenna central frequency is 450M + - 3M;
For 1W VHF module, The antenna central frequency is 150M + - 2M;
The antenna central frequency must be same with the module working frequency, otherwise, it would seriously affect the transmit power and the receive sensitivity;
2) The demo board is subject to be upgraded without notice, the board you get maybe have some difference with the spec.
Reference: DWM18012501
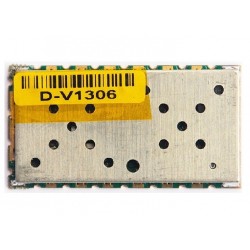
SR-FRS-1WV 136MHz-174MHz 1W VHF Analog walkie talkie module easy to use can be embed into various handheld devices, to improve the comprehensive performance of end products.
Reference: DWM18012502
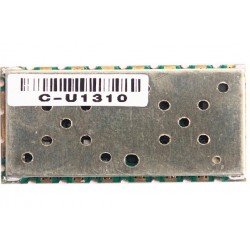
SR-FRS-1WU 400MHz-480MHz 1W UHF Analog walkie talkie module easy to use can be embed into various handheld devices, to improve the comprehensive performance of end products.
Reference: DWM18012601
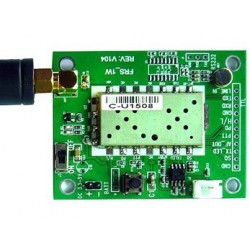
FRS-DEMO-A demo board is a full function Walkie Talkie Transceiver system which can be used for these module evaluation SR-FRS-1WU,SR-FRS-1WV,SR-FRS-2WU.
Reference: DWM18121701
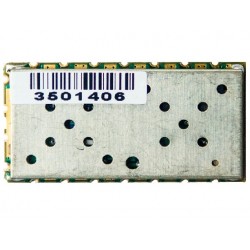
SR-FRS-1W350 350MHz-390MHz 1W UHF Analog walkie talkie module easy to use can be embed into various handheld devices, to improve the comprehensive performance of end products.
Reference: ODL25011805
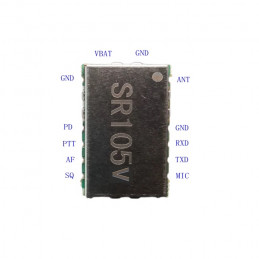
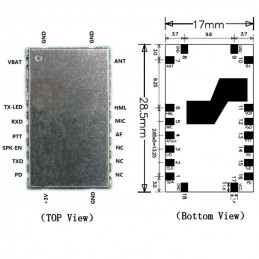
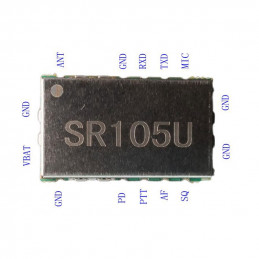
SR105V (VHF:136M-174MHZ) whose functions have been enhanced and pinouts/commands are compatible with FRS-0W5V is an ultra-compact and high-cost performance wireless voice intercom and long-distance data transmission module.
Reference: ODL23123001
SR-DEMO-A demo board is a full-function Walkie Talkie Transceiver system that can be used for News version Enhance modules SR105V, SR105U, SR110V, SR110U, SR120U, SR120V, SR150U, and SR350P.
Reference: DWM18012501
SR-FRS-1WV 136MHz-174MHz 1W VHF Analog walkie talkie module easy to use can be embed into various handheld devices, to improve the comprehensive performance of end products.
Reference: ODL22090804
SR-FRS-0W5 (VHF:136M-174MHZ) is a low cost but high performance integrated walkit talkie module. With built-in high performance micro controller, narrow band rf transceiver and standard Uart interface,it can be easily used and succeed in all the walkie talkie function with good quality voice and long distance transmission.
Reference: DWM15121801
2sets Sa828 All-in-oneV band,134 -- 174MHz, U band, 400 -- 480MHz,3.5-5Km communication distance Walkie Talkie Voice Module for Pocket /handheld devices tytera radios /trunking radio module. .
Reference: DWM18012502
SR-FRS-1WU 400MHz-480MHz 1W UHF Analog walkie talkie module easy to use can be embed into various handheld devices, to improve the comprehensive performance of end products.
Reference: ODL25011803
SR120U is an enhanced version of the SR-FRS-2WU is wireless voice and data transmission walkie-talkie module which built-in with a high-performance radio frequency transceiver chip, microcontroller, and radio frequency power amplifier.
Reference: ODL22092201
SR-FRS-4W (VHF:136MHz-174MHz and UHF: 400MHz-470MHz) is a low cost but high-performance integrated walkie talkie module max power output is 4W. With built-in high performance micro controller, narrow band Rf transceiver.
Reference: ODL22090806
SR-FRS-2WVS 136M-174MHz is 2W a low cost but high performance integrated walkit talkie module. With built-in high performance micro controller, narrow band rf transceiver and standard Uart interface.
Reference: ODL25011804
SR120UV is an enhanced version of the SR-FRS-2WV the wireless voice and data transmission walkie-talkie module which is built-in with a high-performance radio frequency transceiver chip, microcontroller, and radio frequency power amplifier.
Reference: ODL25011801
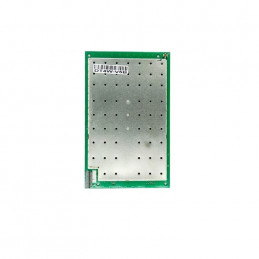
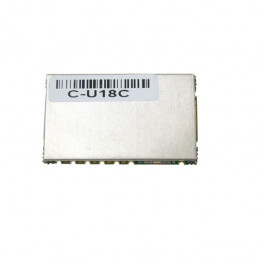
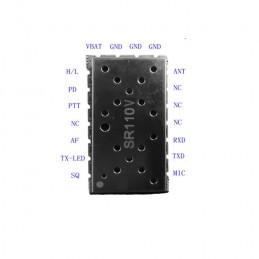
The SR110V is an enhanced version of the SR-FRS-1WV wireless voice and data transmission walkie-talkie module, which includes a high-performance radio frequency transceiver chip, microcontroller, and radio frequency power amplifier.
Reference: ODL22090803
SR-FRS-0W5 (UHF:400M-480MHZ) is a low cost but high performance integrated walkit talkie module. With built-in high performance micro controller, narrow band rf transceiver and standard Uart interface,it can be easily used and succeed in all the walkie talkie function with good quality voice and long distance transmission.
Reference: DWM18121701
SR-FRS-1W350 350MHz-390MHz 1W UHF Analog walkie talkie module easy to use can be embed into various handheld devices, to improve the comprehensive performance of end products.
Reference: ODL25011806
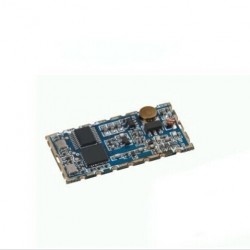
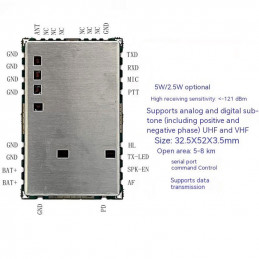
SR105U (UHF:400M-480MHZ) whose functions have been enhanced and pinouts/commands are compatible with FRS-0W5U is an ultra-compact and high-cost performance wireless voice intercom and long-distance data transmission module.
Reference: DWM14071901
DWM-SA818 V band,134 -- 174MHz, U band, 400 -- 480MHz,3.5-5Km communication distance high-integrated Embedded walkie talkie module.
Reference: ODL25011601
The SR150U is the industry's first compact, high-power wireless voice intercom and long-range data transmission module.
FRS-DEMO-B UHF/ VHF Walkie Talkie transceiver and Data transfer demo board which can be used for these module evaluation SR-FRS-1WU,SR-FRS-1WV,SR-FRS-2WU.